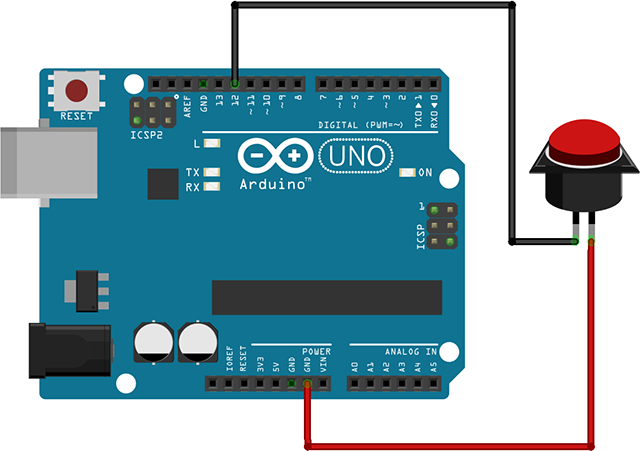
12 番ピンと GND を使い、Push Button のピンに接続します。
接続例
例えばこんな感じにつなぎます。(赤と黒の色逆だ・・まぁ大丈夫です)
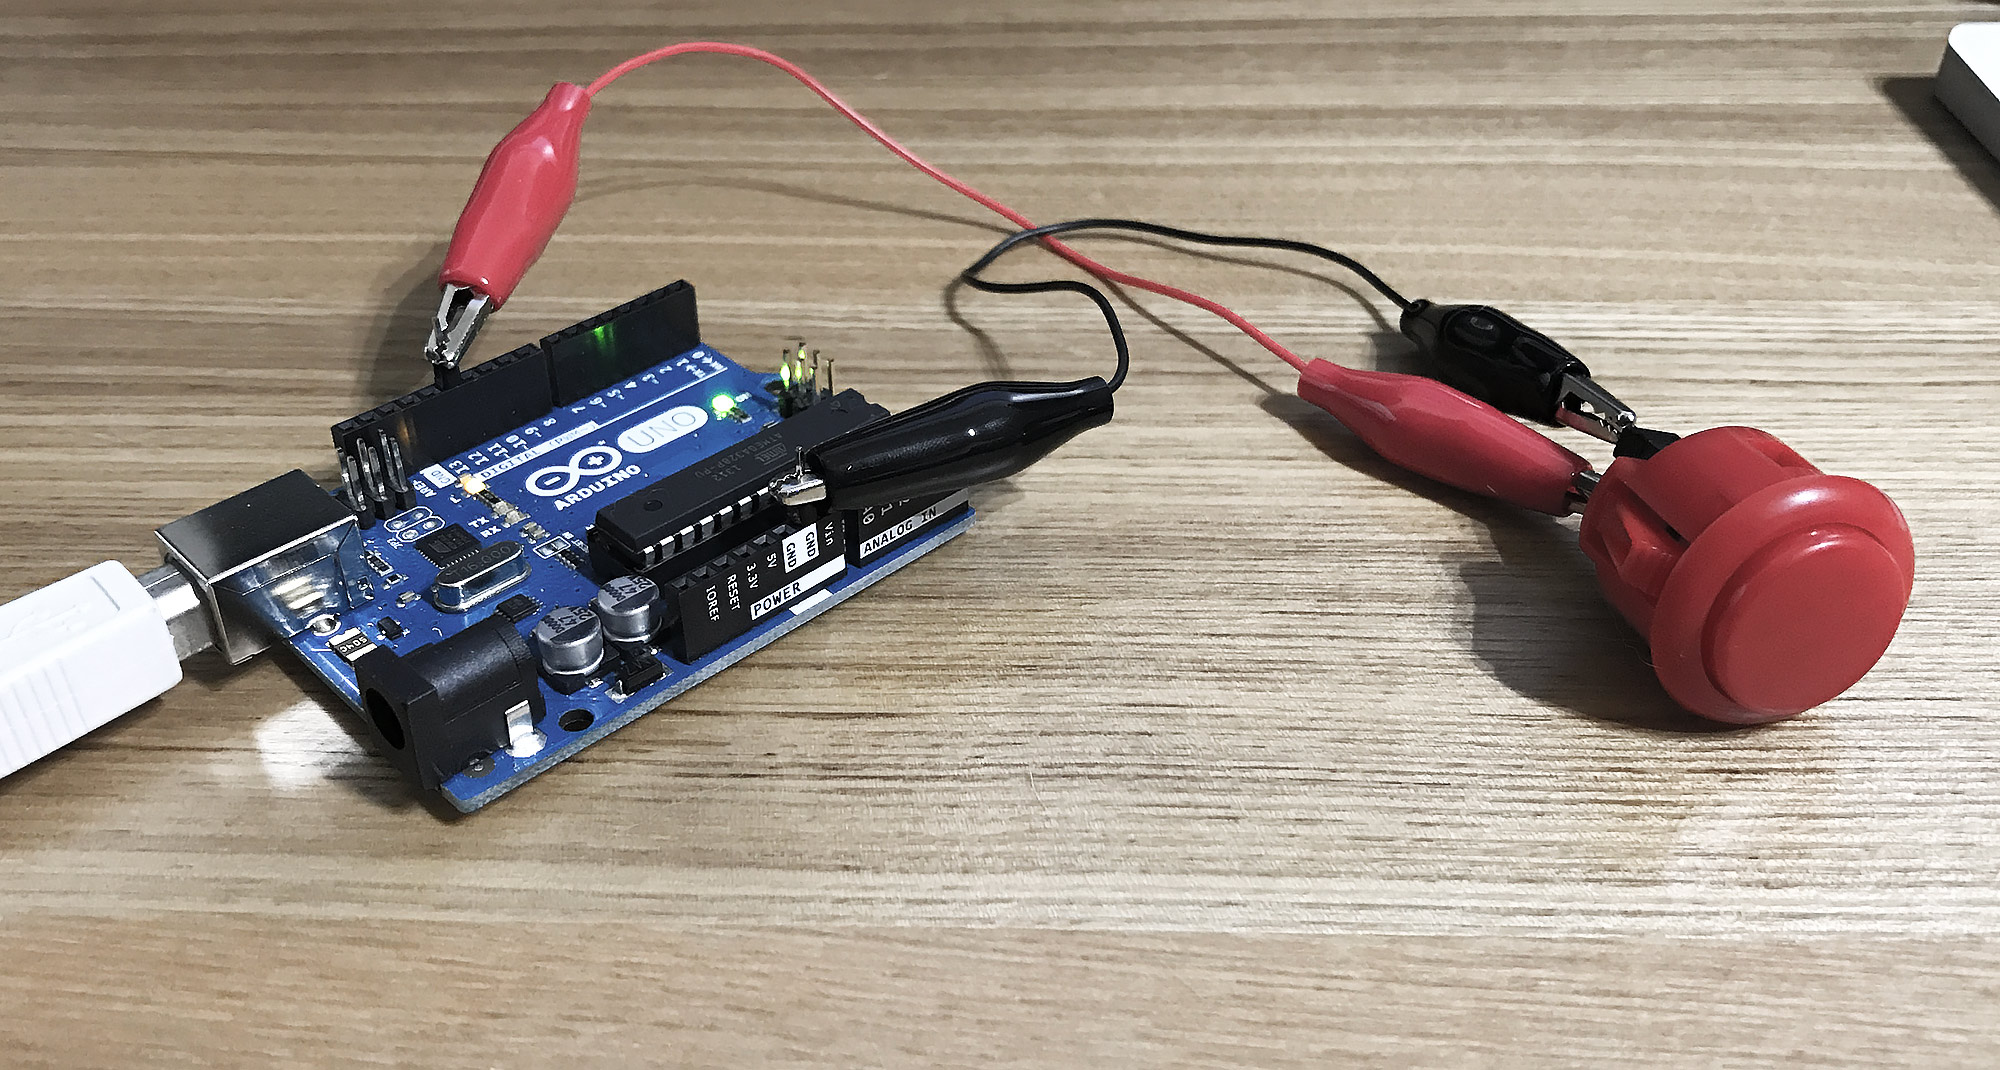
使用したパーツはこんな感じです。
ピンヘッダ(両端ロングピンヘッダ 1×40)
メスピンをオスピンに変えて今回の実験を使いやすくしました。
ミノムシクリップ(テイシン TLA-13)
ピンで挟むだけなので結線が簡単になります。
プッシュボタン(セイミツ PS-14-GN)
アーケードゲームのパッドなどに使われるボタンです。
Arduino に書き込むコード
const int buttonPin = 12;

boolean isHit = false;

void setup() {
  Serial.begin(9600);
  pinMode(buttonPin, INPUT_PULLUP);
}

void loop() {
  int buttonState = digitalRead(buttonPin);
  boolean isPushed = false;
  if (buttonState == LOW) {
    if (!isHit) {
      isHit = true;
      isPushed = true;
    }
  } else {
    isHit = false;
  }

  if (isPushed) {
    Serial.println("PUSHED!");
  }
  delay(50);
}
テスト
Arduino アプリの「シリアルモニタ」を開いて PushButton を押してみます。
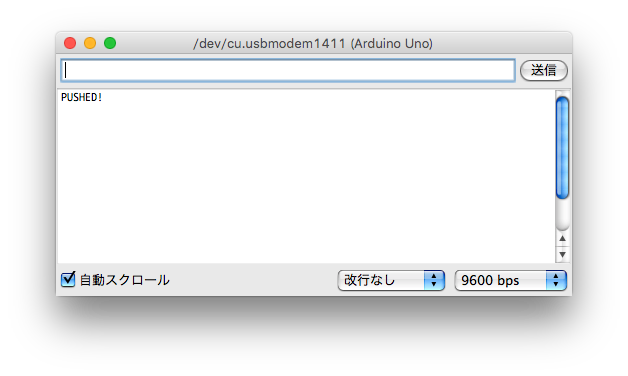
シリアルモニタに出力する文字を変えて、様々なアプリケーションに応用することができます。
 Tweet
Tweet Share
Share Bookmark
- Blog
- Arduino で Push ボタンが押されたことを検知する仕組みを作ってみる
